
How to Draw Billie Eilish - easy Step by Step tutorial for beginners

How to Draw Billie Eilish - easy Step by Step tutorial for beginners
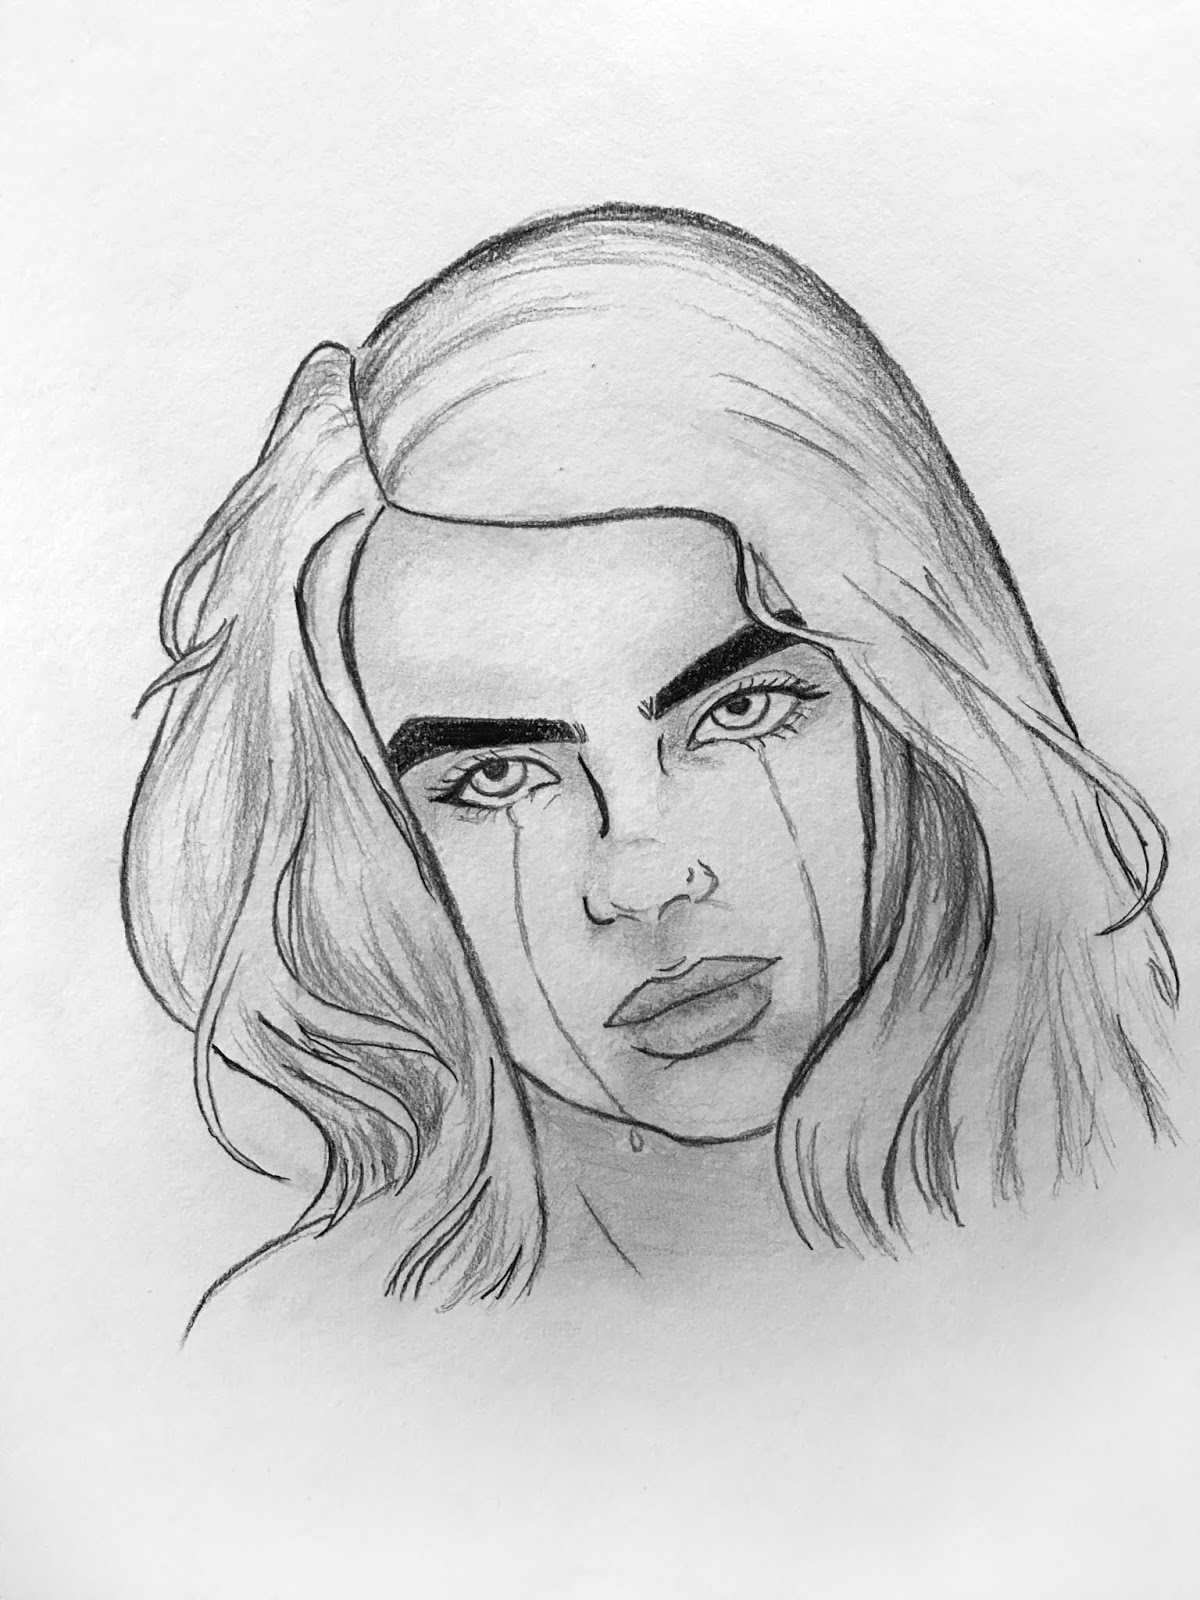
If you want
to draw Billie Eilish in a cartoon way and get the same result that you see in
the picture then take a piece of paper, 2 pencils one dark 2b and one light 2h,
and eraser and follow my lead, do
exactly as I do.
Take the
lighter pencil and draw the shape of the face not round, not ellipse
then draw 3
lines inside of it:
One for the
placement of the eyes, one for nose and one for the mouth.
and then
the central line, which is not exactly in the middle in our case. it doesn't
have to be perfect, if you make a mistake use the eraser and try again slowly
till you get it right.
If you
can't get the shape right, you can download it below and do the tracing trick
on, it's not cheating it will just help you get the proportions right.

Once you
got the shape of the face, move on to the hair.
always
using the lighter pencil, or if you don't have a lighter one just use any
pencil you have and hold it lightly, don't draw strong solid lines, at least
not yet.
Define Some
key points in the intersections of the different guidelines you drew like I did
in the video, or just define them however you want.. as long as you get the
same result.

 continue
with the hair, still with the lighter pencil
continue
with the hair, still with the lighter pencil


Don't be
afraid to make mistakes, you can always use the eraser, or the undo button if
you're drawing on a tab or any digital platform.
The footage
in the video is accelerated to save you some time, I usually draw much slower
than that, you too you should take your time to get the best lines possible.
and if the
video is going too fast for you, pause it till you finish drawing what you
draw, or change the playing speed for the whole thing,
every now
and then I delete some guidelines, to get a clear vision..
 If like the
result of what you draw so far, simply start using the dark pencil to get
strong lines, do not use it untill you're confident to, because it creates a
mess when you want to delete.
If like the
result of what you draw so far, simply start using the dark pencil to get
strong lines, do not use it untill you're confident to, because it creates a
mess when you want to delete.
Feel free
to move the paper in every direction you want, to make it easier for you to
draw, for me in the video I was moving from side to side but just for the sake
of the video. I usually turn the paper to get the best drawing position.

Keep on
drawing and deleting every line you don't like, this is how you learn, many
people don't like it when you tell them you have to practice to get better at
drawing but it's the truth, practice makes everything easier.
your drawing
doesn't have to be exactly like mine with the same number of curves and lines
and all, if you are simply happy with the result you got, then it's fine, move
on to drawing other features.
You have to
be very careful drawing the eyes and eyebrows, because eyes are the most
important features in portrait drawings.
defines
some points to help you with the placement of each eyebrow, take your time and
don't be afraid to not get it correctly from the first try.
In our case
Billie Eilish has thick eyebrows that could be drawn by a little arc ish line
at the bottom, and some kind of triangle at the top..
 Again, once
You're satisfied with the result, start using the dark pencil.
Again, once
You're satisfied with the result, start using the dark pencil.

The upper
part of the nose of Billie Eilish is simply curvy lines, the right one is
exactly on the central line and the left one is under the edge of the right
eyebrow..
the lower
part of the nose takes almost 1/3 of the face, and it is in the center. it is a
little big, the right nostril is more visible than the left one.
 Now the
most important part, the eyes.
Now the
most important part, the eyes.

The eye is
in the space between the nose and the edge of the head, leave a little space
from each side, and put 2 dots, then draw a small arc between them like in the
picture, take all your time, erase and draw again if you don't like the result.
the lower
eyelid is also a small arc ish line but it has a curve near the right side.
then draw
the circle of the eye that would look more like an ellipse, in our case the
eyes are looking up so the upper part of the ellipse will be hidden under the
upper eyelid, and so will be the upper part of the pupil too.
Like I
said, don't rush it, eyes are extremely important.
 Once you're
happy with the result, use the dark pencil again, add some eyelashes, and darken
the pupil, and add some eyeliner too by making the eyelids bold at the left
edge of the eye.
Once you're
happy with the result, use the dark pencil again, add some eyelashes, and darken
the pupil, and add some eyeliner too by making the eyelids bold at the left
edge of the eye.
 and do the
same with the left eye they have to look almost perfectly symmetrical
and do the
same with the left eye they have to look almost perfectly symmetrical


You may add
few eyelashes here and there.. and few short lines around.
 Now moving
to the mouth.
Now moving
to the mouth.

we already
have a line for the mouth, but we need another one for the lower lip that would
be somewhere in the middle between the mouth line and the shape we drew at
first.
The mouth
edges will be roughly under the edges of the nose but a little bigger
the upper
lip is a little smaller than the other one so we will just go a little up the
line and start drawing it.
the lower
lip is simply a round ish line, and the chin line right under it.
 Like the
result? cool just delete the guidelines and use the dark pencil.
Like the
result? cool just delete the guidelines and use the dark pencil.

And finally
the chin and the jaw line.
And here we
go, you can even stop here if you want, it is a good drawing so far, but if you
want, you can continue making it even better.


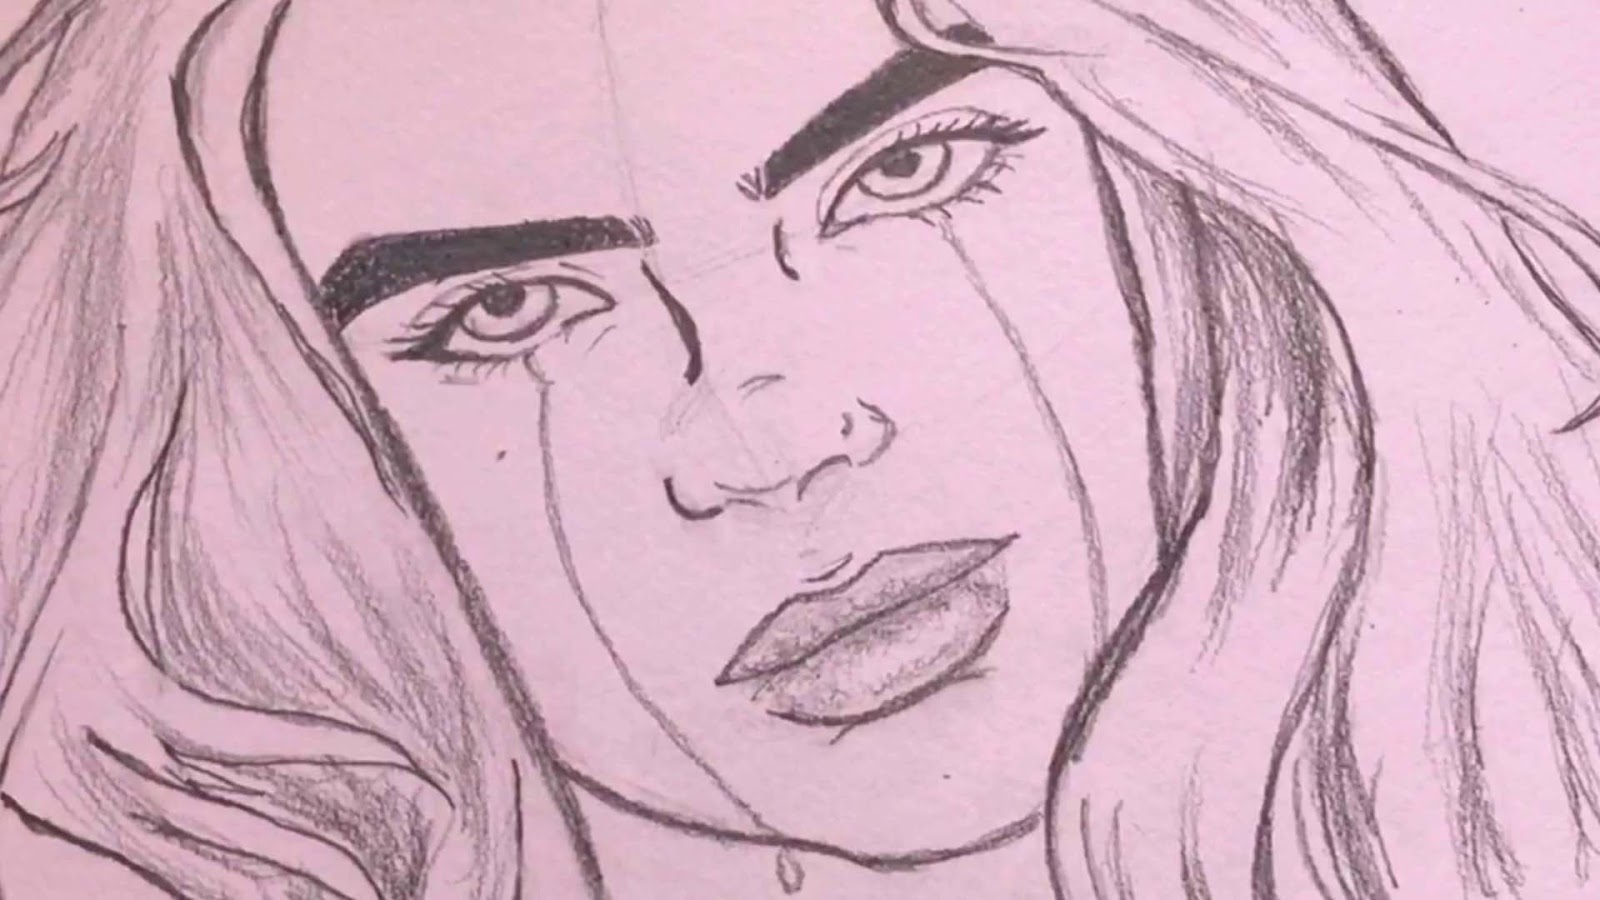
let's draw
tears
Draw a thin
line from the center of the eye, all the way to the chin in a curvy way, like
so.. if it's good then draw another thin line parallel to it and add a small
drop at the end. Same thing for the left eye..
You can also fill the eyebrows
 Back to the
hair, use both the light and dark pencil to darken some areas with different
degrees, to give your drawing some depth..
Back to the
hair, use both the light and dark pencil to darken some areas with different
degrees, to give your drawing some depth..
You can also fill the eyebrows

if you only
have one pencil, you can have two or more degrees of darkness by playing along
with how strong you press on it..
Billie
Eilish has a shiny green hair so simply leave the top of head light, and darken
the sides a little bit.
Fill the
lips, but not in one solid color like the eyebrows, leave the middle of the lower
lip almost white, to give it a shinny look, and add some shadow in a zigzag-ish
lines around the lips like so... used sizzag ish for the lack of a better
word..
 Remove any
guidelines left or any unwanted lines ..
Remove any
guidelines left or any unwanted lines ..
final step
is to add some shadow to the face, around the forehead, around the eyes, under
the nose, and around the chin.
You can
even do some blending, using a blending stick if you have one, or just a small
piece of paper, or even your finger like I did, but be careful with this
technique, it can ruin your drawing if you misuse it.

see you in
the next tutorial.


Leave a Comment